Tag Archives: chashow

How to: Heidi Swapp Marquee Love Letters

Heidi Swapp


Marquee Love by Heidi Swapp

So the moment is finally here when I get to show off to you how amazing and easy to use these Marquee Love letters and symbols by Heidi Swapp really are!

You may remember that we fell in love with these letters at the CHA Show in California in January, and have been counting down the days until their arrival with us. For our introduction to these amazing letters, and a quick tour of Heidi Swapp’s CHA booth, click here.

Marquee Letters

So these letters are 8.5″ high, and each pack comes with everything you need in one kit; the letter itself, a template to trace your letter shape out of, a strand of lights personal to each letter, instructions on the best way to arrange the lights and a battery holder for your AAA batteries. These aren’t included in the pack, but rechargeable ones aren’t too expensive.

The template that comes with the kit is made from a good quality thin plastic material so can be used again and again to change the design and look of your letters.

Materials:

Heidi Swapp Marquee Love Letter Kits
Scissors
Craft knife & cutting mat
Pencil
Cardstock:
A: My Mind’s Eye Necessities Vellum
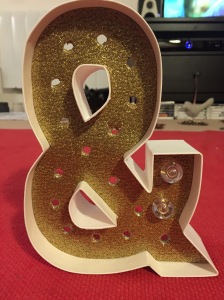
&: Core’dinations Gold Glitter Cardstock
C: My Mind’s Eye On Trend Cardstock

Step-by-step:

Marquee Love by Heidi Swapp

1. Firstly, decide how you are going to decorate your letter(s). I decided to use three different cardstocks for mine to create a different effect for every letter. Plus, as we live in a rented flat at the moment, we don’t actually have a colour theme, so I could be as random as I wanted!

Marquee Love by Heidi Swapp

2. Turn your cardstock over to you are drawing on the reverse. I did this just to make sure I didn’t have any pencil lines on the side that will be showing through! Turn the template over so you have a mirror image and draw around the outside shape with a pencil, making sure you also draw around the holes where the lights will go.

Marquee Love by Heidi Swapp

3. Cut around the pencil lines carefully making sure you stick as close to the edge as possible. The templates make the shape very snug, particularly when using thicker cardstock. Use a craft knife and cutting mat to make cuts in the holes where the lights will go. I did start off with smaller scissors for this, but it got a bit fiddly (and I have no patience!)

Marquee Love by Heidi Swapp

4. Once you have cut out your shape, turn it over and place it into your letter to make sure it fits. You can either do this before or after you have cut out the holes for the lights. If it doesn’t fit, trim it down slightly and gradually until you are happy with it.

Marquee Love by Heidi Swapp

5. Once your cardstock is in place, push the clear bulb caps through one-by-one. With thicker cardstock, these can be quite tricky to push in. If the holes need widening, simply use a pencil to run around the edges of where the bulb will go. This should make a bit more room for the bulb to fit through.

Marquee Love by Heidi Swapp

6. Following the instructions, push the light strand into each bulb cap in turn, add some batteries, and let the light shine!

7. Stand back and rejoice in your handiwork!
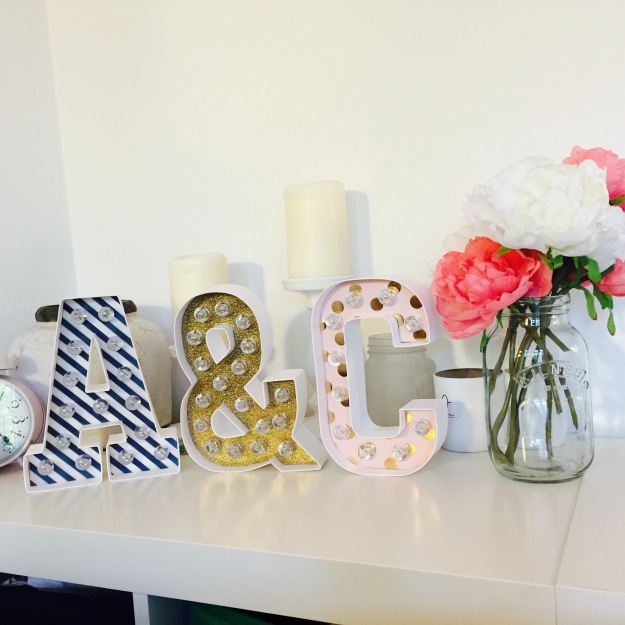
Marquee Love by Heidi SwappEach letter took me about 10 minutes to complete. This was whilst watching tv too, so it shows just how quick and easy they are to set up. I accessorised mine with some candles and candle holders from Ikea, and a mason jar filled with some artificial flowers!

Within the Heidi Swapp Marquee Love range, there are also bulb caps of different colours, and washi tape that matches the dimensions of the letter perfectly, so you can decorate both the inside rim and the outside of the letter.

How would you decorate yours?

The lovely Ellie from The Mummy Diary and Rachel from The Ordinary Lovely have reviewed these letters for us, and we love love LOVE what they have done with them! For inspirations, check out their blogs by clicking on the links above. Here’s what they made with theirs:

Marquee Love by Ellie from The Mummy Diary

Marquee Love by The Ordinary Lovely

How to: Hazel & Ruby DIY Decor Tape

Hazel & Ruby

You may remember that we raved and raved about the new Hazel & Ruby DIY Decor Tape after we came back from the CHA Show in January (you can read that blog post here). We couldn’t wait to get our hands on these amazing rolls, and they started flying out of the door as soon as they came in!

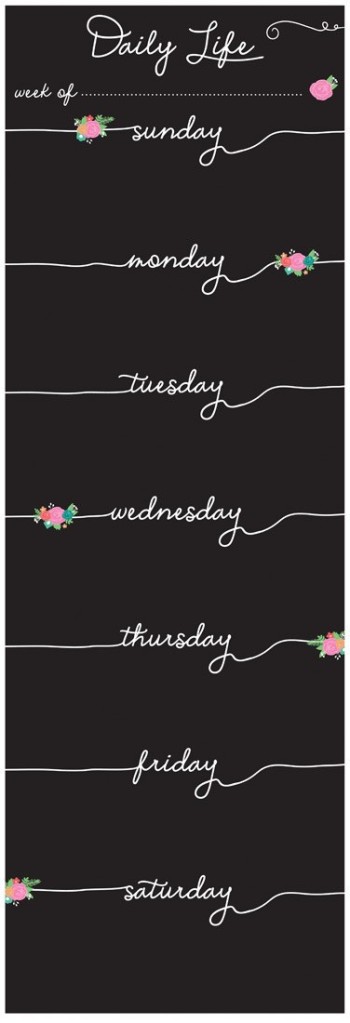
Hazel & Ruby DIY Decor Tape Weekly Calendar

I managed to nab myself a roll of the 8″ wide weekly calendar tape before it all got taken (it’s now back in stock!). This roll is 10ft long, and gives you 4 weeks of roll to play with. You can use it for all sorts of weekly planning including activities, schedule and food plan for the week!

Hazel & Ruby DIY Decor Tape Weekly Calendar

We have no one else to organise but ourselves, but do sometimes struggle to get organised when it comes to what we’re going to eat, so thought this would be the perfect thing to keep us in check! We are also currently renting, so it’s a perfect addition to our home without it needing to be to be nailed into the wall, or leave any damage behind.

We have rather boring white kitchen cupboards, so found the perfect position for our new weekly menu next to our oven! It’s made a huge difference to how organised we are, and love the little personal touch to our rented home.

I used my normal trimmer to trim the tape down to the length I wanted. The tape comes on a handy backing sheet, so this part was really easy. To apply the tape to my cupboard, I peeled just the slightest piece of tape from the backing sheet, attached it to the cupboard, and then used a clean cloth to rub it down to make sure I didn’t have any air bubbles. I took quite a bit of time doing it, as I wanted it to be perfectly flat, but the cloth made this part really easy, and I was so pleased with the finished article.

Finished weekly meal plan


I’m feeling very guilty as I haven’t had the chance to use my sample roll that Lindsay from Hazel & Ruby gave me in the US, but at least it gives me another excuse to play with it!

You can have a look at the full range of Hazel & Ruby DIY Decor Tape rolls here.

We also have an introductory offer of 25% off, and free UK delivery for all orders over £30!

CHA Show 2015 – Booth Tour #7 – Cosmo Cricket

Cosmo Cricket Logo

We loved how many ‘makes and takes’ there were at the CHA Show. It’s a real treat to be able to play with and try out different products, like a ‘try before you buy’! Cosmo Cricket really caught my eye because they had a watercolour ‘make and take’. At the show they released their ‘Just Add Watercolour‘ range, and it was so fun to get to try this out, as I used to use watercolour paints a lot for art projects at school.

Just Add Watercolour Cosmo Cricket

Just Add Watercolour is very much like the name suggests. The collection features a 12″ x 12″ and an 8″ x 8″ paper pad, gift tags, greetings cards and some canvas blocks. All of these feature gold and clear foil resists; just add watercolour and stand back and watch the magic happen!

The paper pads feature full size designs as well as smaller ‘cut-out’ options, and are so pretty to use for cardmaking and scrapbooking projects, as well as framed wall art.

The greetings cards are 4″ x 6″ in two different designs, but very versatile, as you can add whichever colours you want to make the design personal to the recipient.

For their make and take, they had these really sweet badges. You took a disc of watercolour card that already had the resist on it, added watercolour paints of your own colour and design, and then they turned it into a badge for you to wear!

Just Add Watercolour Cosmo Cricket CHA


Cosmo Cricket also had these lids to use with Mason Jars for either ribbon dispensers, or holders for paint brushes, pencils, pens and more!

All of the above products are now available at onestopcraftshop.com and in-store!


CHA Show 2015 – Booth Tour #6 – We R Memory Keepers

We R Memory Keepers

We R Memory Keepers had THE most striking booth of them all at the CHA Show with these amazing 360° Crafter’s Bags! We had been on the hunt for some pretty luggage/storage solutions and were so happy when we came across these beach chair-esque rolling bags! In 3 striking colours, these are the next big thing in storage solutions! They come as flat-packed as they possibly could, so when you’re not using it (why wouldn’t you be?!) it folds away very neatly for easy stowing away (again, why would you ever stow this amazing bag away?!).

Each bag features:

  • 360° wheels
  • 2 clear removable zipped storage pockets
  • 8 multi-sized organisational pockets
  • 1 padded storage pocket
  • Telescoping handle


CHA Show 2015 – Booth Tour #5 – Heidi Swapp (part 2)

Heidi Swapp

There was so much going on at the Heidi Swapp booth at the CHA Show, that I felt it warranted a second post!

Heidi Swapp CHA Show 2015

Yesterday, we revealed the Marquee Love Letters to you, which you can read more about here.

Another range of products that Heidi launched at the show was Minc; a foil applicator and so many accessories to go with it to add a metallic touch to anything and everything!

Heidi Swapp Minc Foil Applicator

One of the best bits of being able to go to the show itself was all the makes and takes that we did. With Heidi, you got to try out her machine with some really cool printed quotes, and see first hand just how quick and easy it was to transform something with the Minc foil applicator.

Here’s a little intro video of the Heidi Swapp Minc Foil Applicator:

All you do is add foil to a laser ink-printed item (word art, sentiments etc) or something from the Heidi Swapp Minc collection (which is already manufactured to specifically bond with the foil), run it through the machine, and you will add a stunning foil effect to your projects! It works very similarly to a laminator, in that you pass your project through the machine in a pouch, and many craft websites (Jenny Collier among others) tell me you can use laminators for this purpose too.

In her range, there are sentiments, papers, coasters, cake toppers, wall art, place cards, envelopes and so much more! Endless foiling possibilities!

This is such a fun way of adding foil to anything you want to, and gives you such free reign over your projects. What would you foil first?