How to: Heidi Swapp Marquee Love Letters

Heidi Swapp


Marquee Love by Heidi Swapp

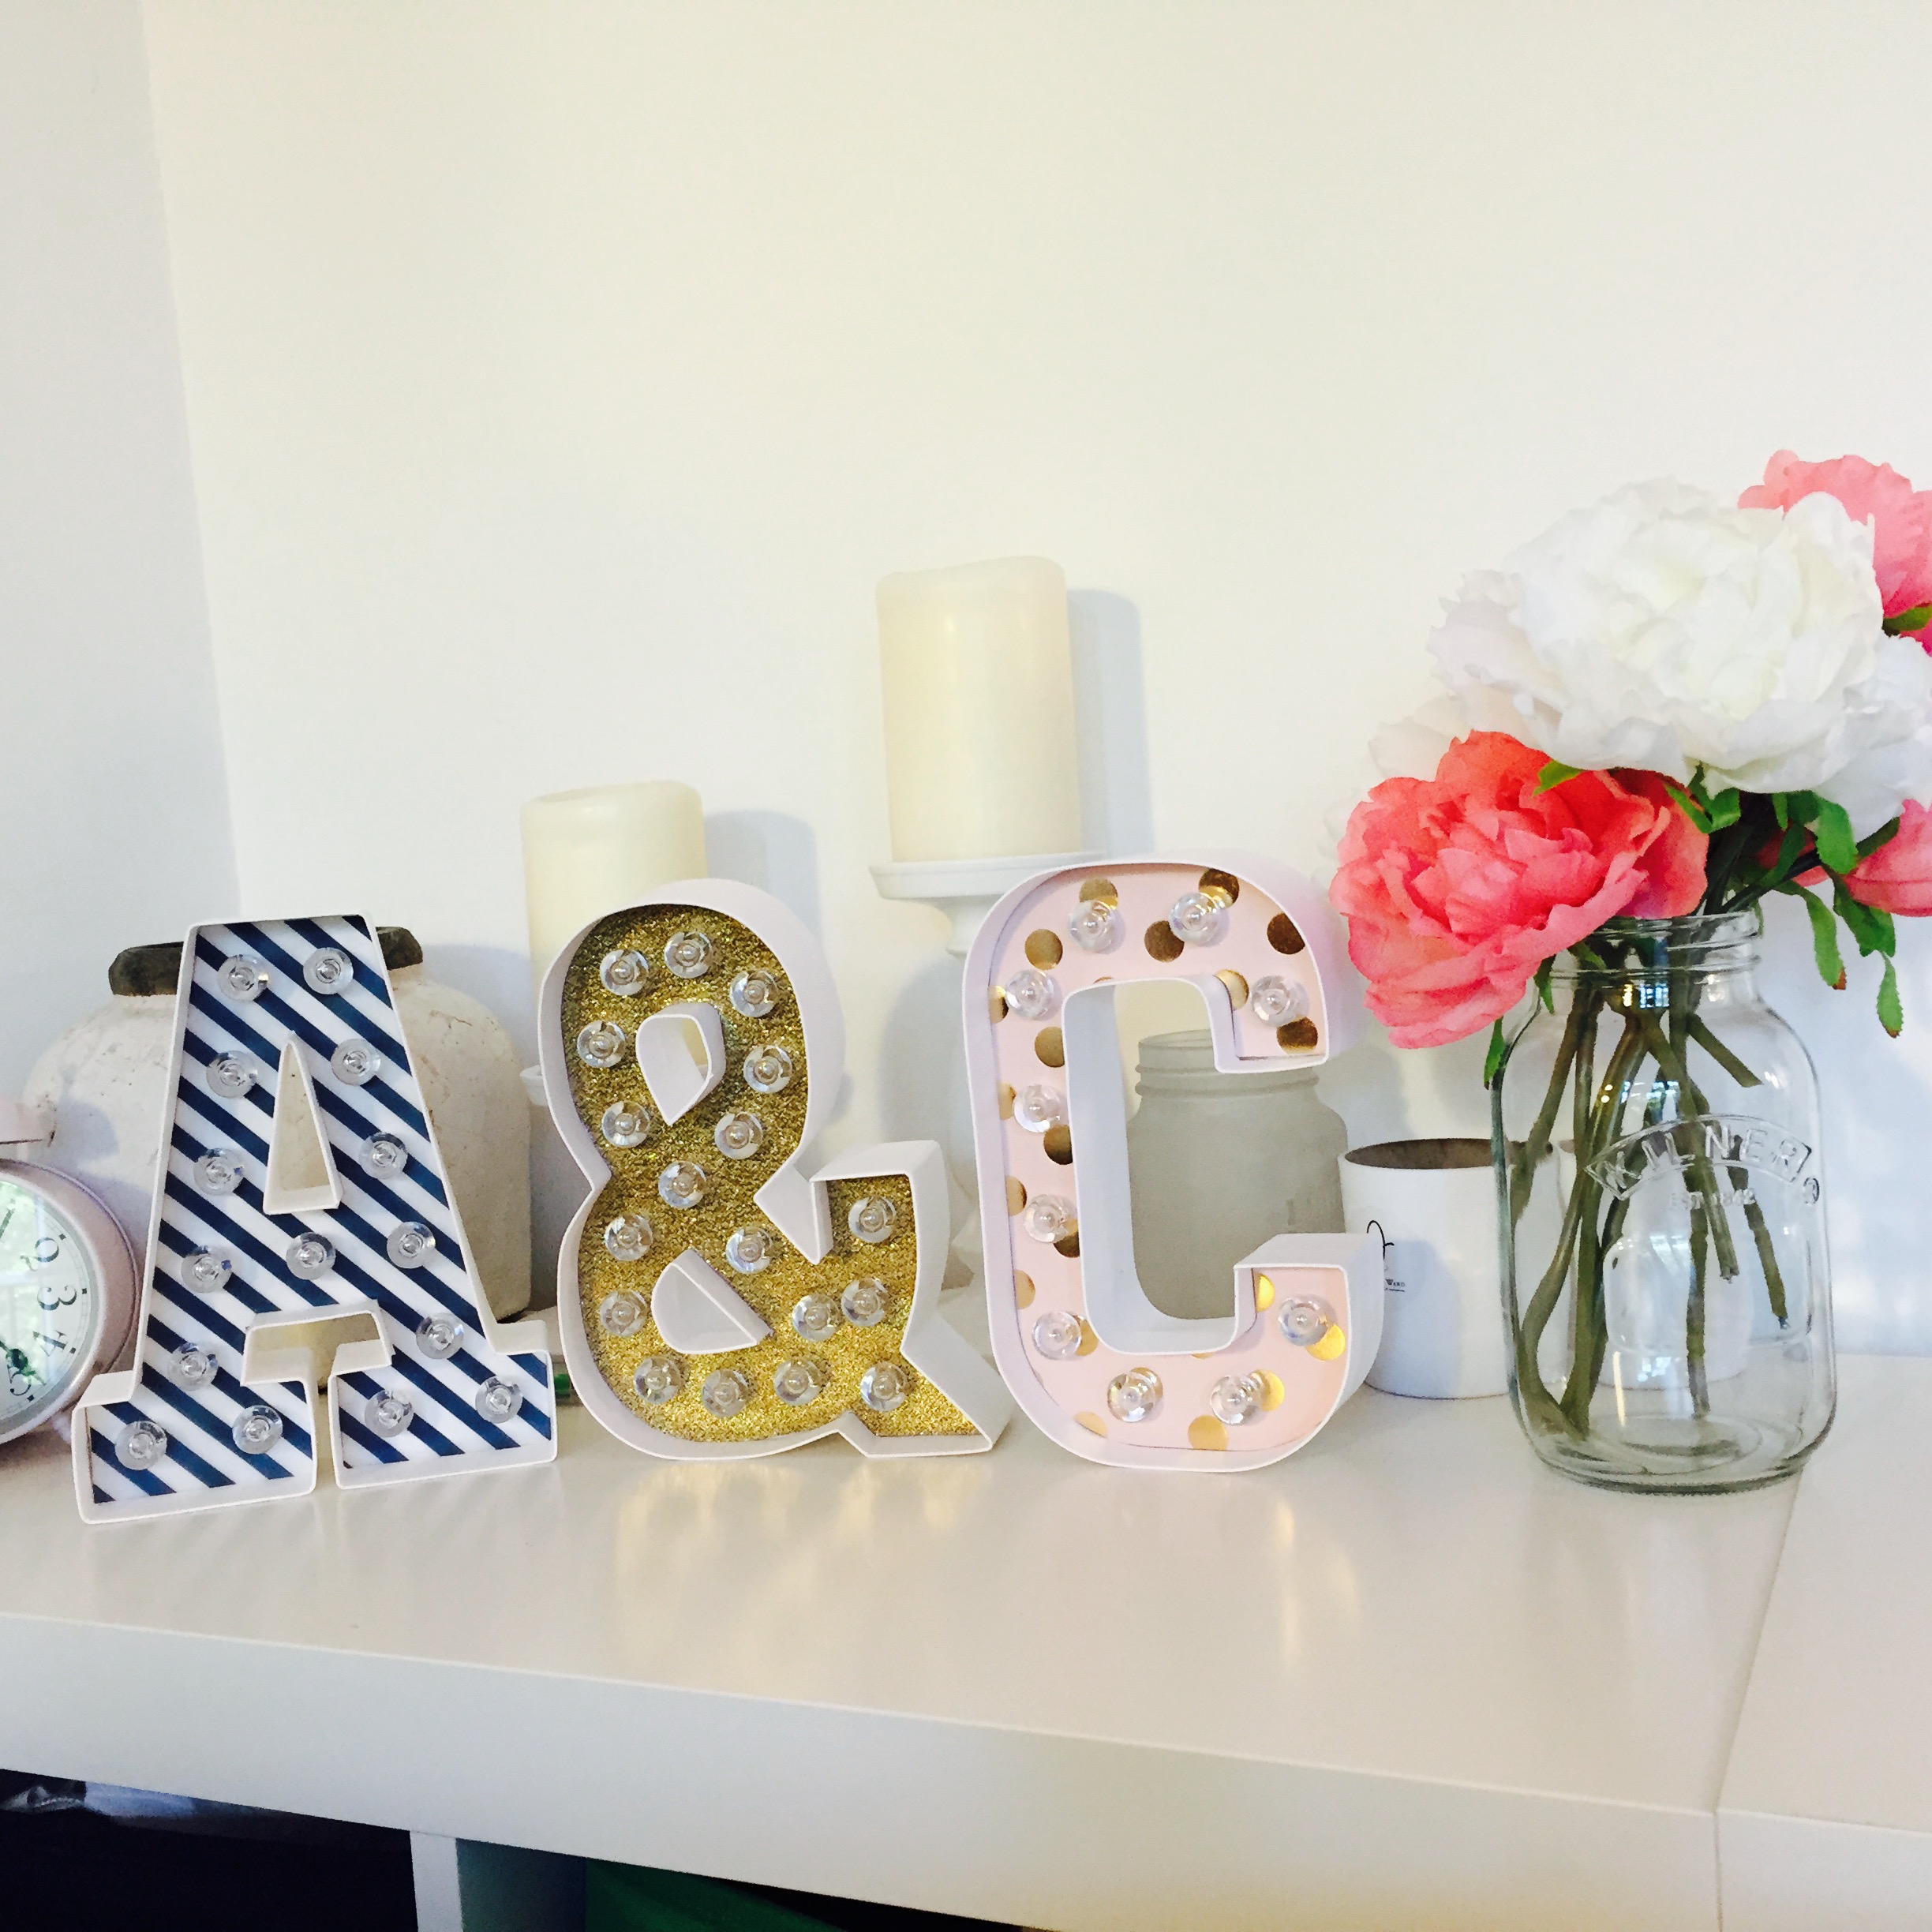
So the moment is finally here when I get to show off to you how amazing and easy to use these Marquee Love letters and symbols by Heidi Swapp really are!

You may remember that we fell in love with these letters at the CHA Show in California in January, and have been counting down the days until their arrival with us. For our introduction to these amazing letters, and a quick tour of Heidi Swapp’s CHA booth, click here.

Marquee Letters

So these letters are 8.5″ high, and each pack comes with everything you need in one kit; the letter itself, a template to trace your letter shape out of, a strand of lights personal to each letter, instructions on the best way to arrange the lights and a battery holder for your AAA batteries. These aren’t included in the pack, but rechargeable ones aren’t too expensive.

The template that comes with the kit is made from a good quality thin plastic material so can be used again and again to change the design and look of your letters.

Materials:

Heidi Swapp Marquee Love Letter Kits
Scissors
Craft knife & cutting mat
Pencil
Cardstock:
A: My Mind’s Eye Necessities Vellum
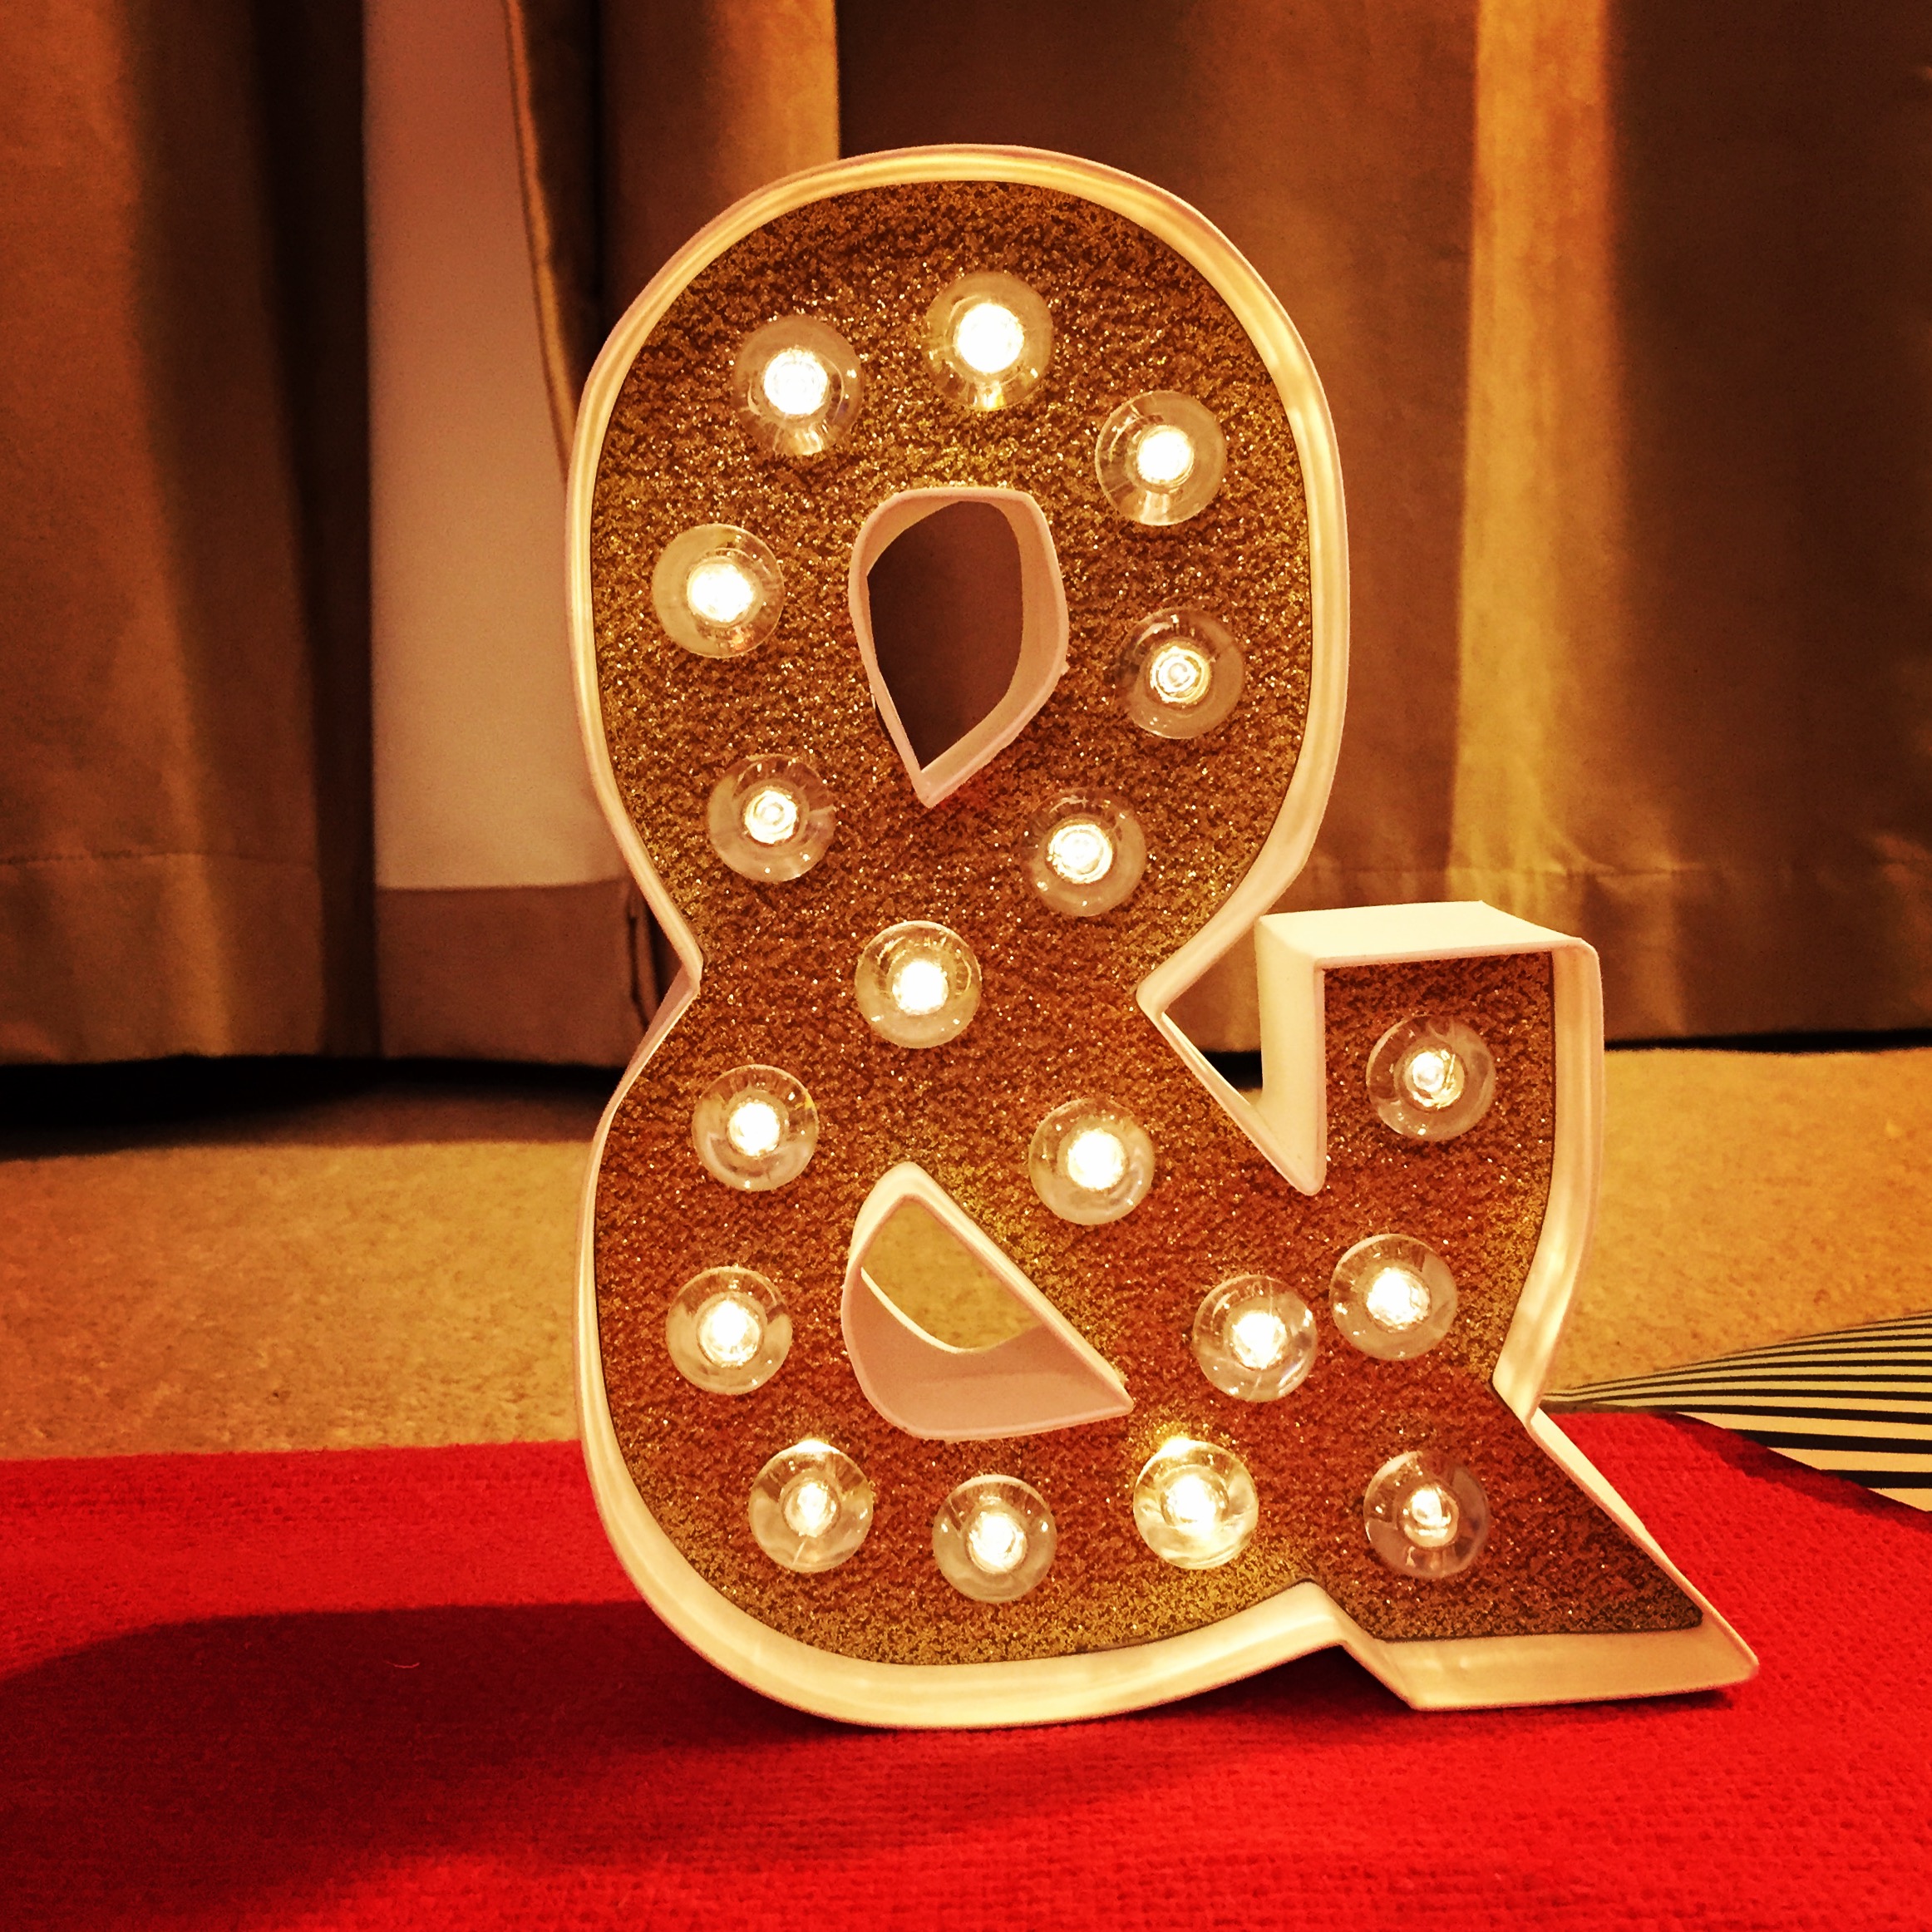
&: Core’dinations Gold Glitter Cardstock
C: My Mind’s Eye On Trend Cardstock

Step-by-step:

Marquee Love by Heidi Swapp

1. Firstly, decide how you are going to decorate your letter(s). I decided to use three different cardstocks for mine to create a different effect for every letter. Plus, as we live in a rented flat at the moment, we don’t actually have a colour theme, so I could be as random as I wanted!

Marquee Love by Heidi Swapp

2. Turn your cardstock over to you are drawing on the reverse. I did this just to make sure I didn’t have any pencil lines on the side that will be showing through! Turn the template over so you have a mirror image and draw around the outside shape with a pencil, making sure you also draw around the holes where the lights will go.

Marquee Love by Heidi Swapp

3. Cut around the pencil lines carefully making sure you stick as close to the edge as possible. The templates make the shape very snug, particularly when using thicker cardstock. Use a craft knife and cutting mat to make cuts in the holes where the lights will go. I did start off with smaller scissors for this, but it got a bit fiddly (and I have no patience!)

Marquee Love by Heidi Swapp

4. Once you have cut out your shape, turn it over and place it into your letter to make sure it fits. You can either do this before or after you have cut out the holes for the lights. If it doesn’t fit, trim it down slightly and gradually until you are happy with it.

Marquee Love by Heidi Swapp

5. Once your cardstock is in place, push the clear bulb caps through one-by-one. With thicker cardstock, these can be quite tricky to push in. If the holes need widening, simply use a pencil to run around the edges of where the bulb will go. This should make a bit more room for the bulb to fit through.

Marquee Love by Heidi Swapp

6. Following the instructions, push the light strand into each bulb cap in turn, add some batteries, and let the light shine!

7. Stand back and rejoice in your handiwork!

Marquee Love by Heidi SwappEach letter took me about 10 minutes to complete. This was whilst watching tv too, so it shows just how quick and easy they are to set up. I accessorised mine with some candles and candle holders from Ikea, and a mason jar filled with some artificial flowers!

Within the Heidi Swapp Marquee Love range, there are also bulb caps of different colours, and washi tape that matches the dimensions of the letter perfectly, so you can decorate both the inside rim and the outside of the letter.

How would you decorate yours?

The lovely Ellie from The Mummy Diary and Rachel from The Ordinary Lovely have reviewed these letters for us, and we love love LOVE what they have done with them! For inspirations, check out their blogs by clicking on the links above. Here’s what they made with theirs:

Marquee Love by Ellie from The Mummy Diary

Marquee Love by The Ordinary Lovely

Happy 1st Birthday!

one-year-ago-today

Today, it’s our bloggy birthday! It’s been a year since we re-launched our blog, and my has the time flown!

To celebrate this milestone, have £5 off your next order!*

Use ‘BLOGBIRTHDAY‘ at checkout and visit onestopcraftshop.com to redeem your voucher!

Happy Birthday to us, and happy shopping to you!

*valid until 4th June 2015

New Distress Inks: Colour of the Month – January, February & March

Ranger Ink

At the CHA show in January, Tim Holtz and Ranger announced their new products for 2015. For the first time in its product launch history, Ranger is releasing a collection of distress products by colour versus product category. Every month in 2015, Ranger are adding one new colour to the Distress product line; each new Distress colour will be available in 6 different Distress products – 2″ standard ink pad, re-inker, marker, stain, spray stain and paint.

Distress Ink Pad

Distress ink pads are perfect for the new vintage, stained, aged effect crafters are creating in their altered books, scrapbook pages, cards and paper craft projects. These products produce a weathered look on paper, photos and decorative fibres.


Distress Stains
are fluid water-based dyes for papers and other porous surfaces. Use for quick and easy ink coverage for backgrounds and larger areas. Mist with water to lighten colour and create mottled effects. Apply layers of stain to achieve more saturated colour. Spray Stains are the same fluid, water reactive formula crafters have come to love in the Distress Stains, but now available in a spray format.The 1.9 fl. oz Distress Spray Stains feature a quality mist sprayer. Use for quick and easy ink coverage on porous surfaces. Spray through stencils, layer colours, spritz with water and watch the colour mix & blend.

Distress Marker project by Jennifer McGuire Ink

 Distress Markers are water-based inks for colouring, journaling, stamping and more. The dual tip markers are ideal for many colouring techniques.

Distress Paint demo

Distress Paints are very fluid water-based acrylic paints for multiple surfaces. Tim and Ranger developed these special paints to be reactive with water just like Distress Inks and Distress Stains—perfect to accomplish a wide variety of artistic techniques. Distress Paints have a convenient dabber system for easy and mess-free application.

Reinkers are available for the Distress Ink Pads so you’ll never run out of your favourite colours!

Cracked Pistachio - January Colour of the Month Distress

January’s Colour of the Month is Cracked Pistachio – a stunning green hue that is right on trend for this year!

Here, Tim Holtz introduces the new Distress programme, and January’s Colour of the Month!

Abandoned Coral - February Colour of the Month Distress

February’s Colour of the Month is Abandoned Coral – a vibrant fusion of pink and orange, and another key colour for this year’s craft ranges.


Mermaid Lagoon - March Colour of the Month DistressMarch’s Colour of the Month is Mermaid Lagoon – a deep rich turquoise colour.

All three of these colours are now available online and in-store.

Each month, Ranger will release a new colour to their collection, and they have just announced the colours for April and May; Fossilised Amber and Twisted Citron! These will be available online very soon!

How to: Avery Elle bookmark

Avery Elle Logo

I have to admit, that apart from crafting, my other love is reading. I am a total book worm. I tend to take at least 3 books with me when I go on holiday, have multiple books on the go at the same time, and am always on the look out for new books to add to my “collection” even when I have a pile of unread books at home!

At the CHA show, we got to sample Avery Elle’s bookmark die (which as you can imagine, I was so happy about!). They had actually already pre-cut the bookmarks themselves, but the die looked so easy to use, and had a few different options. You can either make a full ‘traditional’ bookmark, or 3 page clips, and there is a coordinating stamp set to decorate the bookmarks with. The die is compatible with all leading brand die-cutting machines, so is really universal.

Here’s an intro video to the bookmark die set:


This is my finished product. This phrase completely sums me and my reading style up, and I loved being able to add my own colours to the floral border to make it my own. We actually used Copic markers to colour in the design, which were so easy to use. They’ll be coming soon to the website and shop.

This bookmark has now made it through 6 different books since the CHA show, and still going strong!

Avery Elle Bookmark

What would you do with yours?

To find out more about the bookmark die, click here.

To find out more about the “This Book” stamp set, click here.

How to: Hazel & Ruby DIY Decor Tape

Hazel & Ruby

You may remember that we raved and raved about the new Hazel & Ruby DIY Decor Tape after we came back from the CHA Show in January (you can read that blog post here). We couldn’t wait to get our hands on these amazing rolls, and they started flying out of the door as soon as they came in!

Hazel & Ruby DIY Decor Tape Weekly Calendar

I managed to nab myself a roll of the 8″ wide weekly calendar tape before it all got taken (it’s now back in stock!). This roll is 10ft long, and gives you 4 weeks of roll to play with. You can use it for all sorts of weekly planning including activities, schedule and food plan for the week!

Hazel & Ruby DIY Decor Tape Weekly Calendar

We have no one else to organise but ourselves, but do sometimes struggle to get organised when it comes to what we’re going to eat, so thought this would be the perfect thing to keep us in check! We are also currently renting, so it’s a perfect addition to our home without it needing to be to be nailed into the wall, or leave any damage behind.

We have rather boring white kitchen cupboards, so found the perfect position for our new weekly menu next to our oven! It’s made a huge difference to how organised we are, and love the little personal touch to our rented home.

I used my normal trimmer to trim the tape down to the length I wanted. The tape comes on a handy backing sheet, so this part was really easy. To apply the tape to my cupboard, I peeled just the slightest piece of tape from the backing sheet, attached it to the cupboard, and then used a clean cloth to rub it down to make sure I didn’t have any air bubbles. I took quite a bit of time doing it, as I wanted it to be perfectly flat, but the cloth made this part really easy, and I was so pleased with the finished article.

Finished weekly meal plan


I’m feeling very guilty as I haven’t had the chance to use my sample roll that Lindsay from Hazel & Ruby gave me in the US, but at least it gives me another excuse to play with it!

You can have a look at the full range of Hazel & Ruby DIY Decor Tape rolls here.

We also have an introductory offer of 25% off, and free UK delivery for all orders over £30!